I am amazed how this bread turned out. I rarely like* what I bake, but this bread was awesome. Since I came back from the Vipassana Course and the Freestone bakery, I was looking for bread recipes. Compared to cakes and cookies, baking bread is really hard and very much time consuming. It needs lots of love and patience, easier said than done...who has 6 hours to spend at home on a two day weekend? Well, I was already home baking for the shower cake, so I thought I might as well try a bread recipe as well...
It took me 2 days, from start to the end but when I tasted it, I could not believe how crusty and rustic this bread was. I used the Torpido 10 grain recipe from the Bread Bible book as a base and changed it a little. When Phil was visiting SF, he encouraged me to improvise a little (!), so I made some changes since I didn't have all grains at home. Here are the basic steps I followed for the last two days:
1) Ferment the sponge overnight
2) Soak the grains in water overnight
3) Mix the dough
4) Rest the dough for 30 minutes
5) Mix the grains
6) 1st rising-2 hours
7) Punch the dough
8) 2nd rising- 1 hour
9) Shape the dough
10) Final rising-1 hour
11) Score and bake! (30-35 minutes)
12) Take the bread on a wire rack and immediately leave the house so you won't eat the entire bread before it cools!
I am really getting better at this:)

Sunday, January 22, 2006


Angel Food Cake with Chocolate-Pistachio Filling
I tried Martha Stewart's Angel Food Cake recipe for my friend Kim's baby shower. It was great. The cake turned out very moist and really tall, I was able to cut into four and used the chocolate mousse recipe from Eric's Aunt, added pistachios for a change and it turned out very good. Check out the pictures for step by step instructions. Email me if you need the recipe...

Wednesday, January 18, 2006
Guest Baker from Istanbul

Cenk made this amazing tart and sent me the recipe and I could not resist having him on my blog as a guest baker. We lived together more than 2 years @ 645 22nd Avenue (prime location if you are into foggy Sundays) and if you can believe it, we rarely baked at those times....Maybe once or twice....However, Cenk cooked a lot and I got to eat tons in those days:)))
The picture above was taken around 2002, when all my friends were in town for New Years and Cenk is the cutest guy on the picture, if you still have trouble locating him, he is the second guy on the left.
These days, I keep bugging him to move back and help me start my business and he keeps bugging me to move back and start something in Istanbul...We'll see what will happen....
About the tart, he created his own stencil, so feel free to do your own as well...Polka dots would be fun, as well as stripes or you can go free style and just dust powdered sugar on top the cooled tart. Hope you like it, I wish I had a slice!
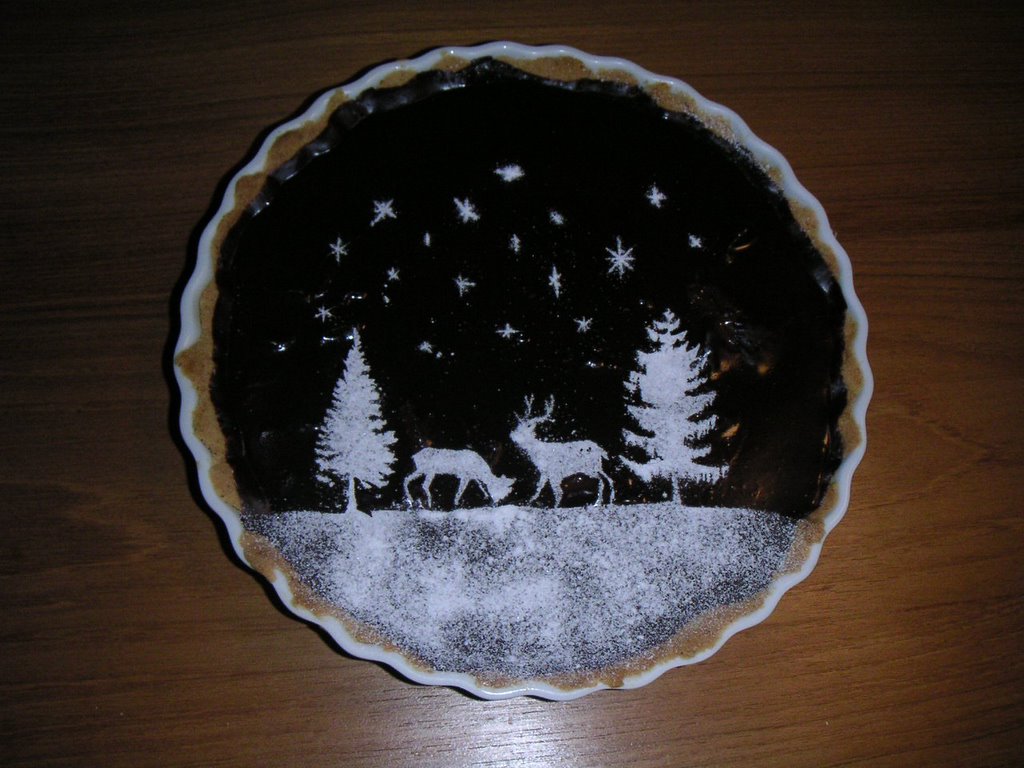
Chocolate Ganache Tart
a Martha Stewart recipe
Serves 10; Prep time: 25 minutes; Total time: 2 hours 20 minutes
Ingredients
3 tablespoons slivered blanched almonds
6 tablespoons sugar
1 3/4 cups all-purpose flour (spooned and leveled)
2 teaspoons grated orange or lemon zest (optional)
1/4 teaspoon salt
6 tablespoons unsalted butter, cold and cut into pieces
12 ounces bittersweet chocolate, coarsely chopped
1 1/4 cups heavy cream1 teaspoon vanilla extract
Method
1. Preheat oven to 350°. Make dough: In a food processor, pulse almonds until finely ground. Add sugar, flour, zest (if desired), and salt; pulse until combined. Add butter, pulsing until coarse crumbs form with no large butter lumps (dough should clump together when squeezed with fingers).
2. Immediately transfer dough to a 9-inch tart pan with a removable bottom. Using a measuring cup, evenly press dough in bottom and up sides of pan.
3. Bake in center of oven until golden brown and firm to the touch, about 20 minutes. Transfer to a wire rack to cool completely, about 1 hour.
4. Make ganache: Place chocolate in a large mixing bowl. In a small saucepan, bring cream to a boil. Pour hot cream, through a sieve, over chocolate. Stir until smooth and creamy in texture. Mix in vanilla.
5. Pour chocolate mixture into center of cooled tart shell (if chocolate is lumpy, pass through a sieve). Let stand until set, about 2 hours, or chill for 1 hour.
Thank you for sharing Zozi! Lots of kisses and hugs! I think this tart should be on our menu!
Update: I changed the original picture I posted yesterday due to ill-willed email threats I got from my guest baker (!)..Apparently, he did not want to be discovered by GQ:) Damn, these confident good looking guys, piece of work:)
Friday, January 13, 2006
Happy 2006!
"Difficult to detect and very subtle,
the mind seizes whatever it wants;
so let a wise man guard his mind,
for a guarded mind brings happiness.
Dhammapada 36"
Hello everyone! I know its been too long since I last posted but the holidays are over, I am back to the daily routine, feeling very very happy, content and rested. I know this because I can feel it, literally.
Most of you know that I joined Eric and his father, Phil for the 10-day Vipassana meditation course and they were the hardest days in my 29.9 years in this life time! It was rather a bootcamp, hours of diligent (!) and vigorous (!) mind training, 4:30 am to 9:00 pm, every day! I haven't worked this much ever but I found everything I was looking for and even more.
I thought about leaving on Day 2, stopped meditating and did tons of day dreaming and thanks to that awful experience I realized why I was there. I was constantly rolling between the memories of the past or dreaming in the future and was unable to "be" in the present. Madness! (also, it helped that Eric drove, so I could not get out as easy as I would have).
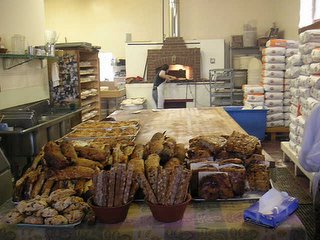 After we left the campsite, we stopped for a quick bite and good coffee at a local bakery, highly recommended by a fellow meditator. Freestone Bakery....It can't get more real than that, no shine, no glitz, but, very rustic, hearthy, earthy. It was the perfect ending and I got a glimpse of where I could be one day... The bags of flour stacked up on the floor, bakers in their white aprons, the brick oven and I saw myself on the other side of the counter. Will you hire me?
Some good karmas of the past introduced me to Eric and I am just grateful to the universe for that. You can read on Art of Living from the Dhamma site here...It is phenomenal.
May you all be happy, filled with joy and happiness every single moment.
I have so many new ideas for the site and will be posting plans for 2006 soon. Stay tuned!
the mind seizes whatever it wants;
so let a wise man guard his mind,
for a guarded mind brings happiness.
Dhammapada 36"
Hello everyone! I know its been too long since I last posted but the holidays are over, I am back to the daily routine, feeling very very happy, content and rested. I know this because I can feel it, literally.
Most of you know that I joined Eric and his father, Phil for the 10-day Vipassana meditation course and they were the hardest days in my 29.9 years in this life time! It was rather a bootcamp, hours of diligent (!) and vigorous (!) mind training, 4:30 am to 9:00 pm, every day! I haven't worked this much ever but I found everything I was looking for and even more.
I thought about leaving on Day 2, stopped meditating and did tons of day dreaming and thanks to that awful experience I realized why I was there. I was constantly rolling between the memories of the past or dreaming in the future and was unable to "be" in the present. Madness! (also, it helped that Eric drove, so I could not get out as easy as I would have).
 After we left the campsite, we stopped for a quick bite and good coffee at a local bakery, highly recommended by a fellow meditator. Freestone Bakery....It can't get more real than that, no shine, no glitz, but, very rustic, hearthy, earthy. It was the perfect ending and I got a glimpse of where I could be one day... The bags of flour stacked up on the floor, bakers in their white aprons, the brick oven and I saw myself on the other side of the counter. Will you hire me?
Some good karmas of the past introduced me to Eric and I am just grateful to the universe for that. You can read on Art of Living from the Dhamma site here...It is phenomenal.
May you all be happy, filled with joy and happiness every single moment.
I have so many new ideas for the site and will be posting plans for 2006 soon. Stay tuned!
Thursday, December 15, 2005
Happy Holidays!
It is officially the start of the holiday season for me! I have done quite a few treats, including my favorite Turkish dessert sekerpare, several cookies and cupcakes. Stay tuned for the recipes in the coming days. Many Thanks to Belmin for my Christmas Banner, she is amazing as always! Happy holiday season everyone, eat lots of sweets!

Kestaneden Kartoplari
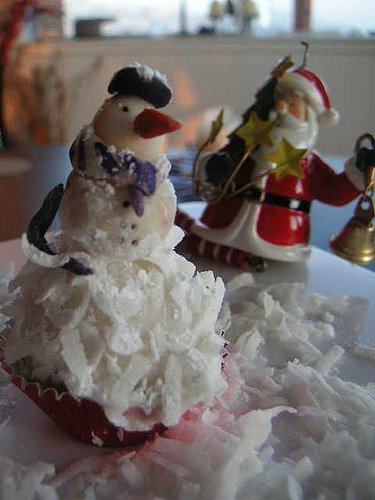
Bu ayki Ye'nin konusu Kestane, ben de tam yilbasi oncesi herkesin yapabilecegi, pratik ve lezzetli bir tarif bulup denemek istedim. Yilbasi partinizde bu tarifi ikram edebilirsiniz, ya da tatli seven arkadaslariniza guzelce paketleyip hediye olarak da verebilirsiniz.
Malzemeler:
1kg kestane
1/2 kavanoz şokella
2 çorba kaşığı pudra şekeri
100gr erimiş margarin
1 çay fincanı sıcak süt
1 bardak dişli çekilmiş ceviz
Glaze:
1 bardak hindistancevizi sutu (coconut milk) ve ya sut
4 bardak pudra sekeri
Susleme:
Hindistancevizi
Yapılışı:
Kestaneleri yıkadıktan sora üzerlerini bıçakla çizerek içine bir tatlı kaşığı toz şeker ve 1 çay kaşığı tuz koyduğunuz kapta üstünü örtecek kadar suyla çizilen yerlerden ayrılmaya başlayana kadar haşlayin.
Kestaneleri sudan çıkarıp ayıklayın (tüylü zarı üstünde kalmasın).
Ayıkladığınız kestaneleri tekrar yeni su koyarak ve 1 tatlı kaşığı toz şeker ilavesi ile haşlayın.
Kestaneleri ezerek püre haline getirin, pudra şekerini, şokellanın yarısını, erimiş margarini ve dövülmüş cevizi katarak yoğunlaştırın. Karisimi buzdolabinda yarim saat dinlenmeye birakin.
Simdi sira toplarin uzerine dokecegimiz glazenin hazirlanmasinda. 1 bardak hindistancevizi sutu (ya da normal sut) ile 4 bardak pudra sekerini karistirin.
Buz dolabinda beklettiginiz kestaneli karisiminizindan ceviz buyuklugunde toplar yapin ve hazirladiginiz glazeyi uzerine dokun. Toplari ardindan hindistan cevizine baritin, kartoplariniz hazir! Eger vaktiniz varsa, sekilli kaliplardan minik yildizlar ya da bademezmesinden kardanadam yapin.
Umarim begenirsiniz, yorumlarinizi bekliyorum, ne demisler kestane kebap, acele cevap!
Monday, December 12, 2005
Holiday Treats (1)
Here is a super easy holiday sweet treat for all the kids, young and old! It also makes a great gift as it keeps well. For those of you, who keep complaining that you don't have time to bake, the whole thing takes only 10 minutes and no baking needed!
Peppermint Rocky Road
Ingredients:
1 bag, 12 oz. semi-sweet chocolate chips
1 can (14 oz.) sweetened condensed milk
2 tablespoons of unsalted butter
3 cups dry roasted peanuts or almonds or walnuts (I used peanuts)
1 bag, 10.5 oz, mini marshmallows
1 large candy cane, crushed*
* Note: If you are already maxed out with the mint -thanks to the amazing peppermint mochas, you can omit the candy cane, but the mint does add some serious kick to this holiday tradition.
Line a rectangular cake pan, (9*13) with wax paper.
1) Melt chocolate chips, sweetened condensed milk and butter in microwave, stirring, until smooth and chips are melted. Use medium power and stir every 30 seconds. If you don't have a microwave, you can use a double boiler and melt everything on the stove.
2) Stir in peanuts and marshmallows.
3) Spread the mixture in the greased pan. Sprinkle crushed candy cane on top.
Refrigerate until firm, about 2-3 hours. Once firm, you can cut the bars into small cubes and wrap them individually as gifts.
to be cont'd...
More recipes and pictures are on the way, so stay tuned!
Happy Holidays!

Peppermint Rocky Road
Ingredients:
1 bag, 12 oz. semi-sweet chocolate chips
1 can (14 oz.) sweetened condensed milk
2 tablespoons of unsalted butter
3 cups dry roasted peanuts or almonds or walnuts (I used peanuts)
1 bag, 10.5 oz, mini marshmallows
1 large candy cane, crushed*
* Note: If you are already maxed out with the mint -thanks to the amazing peppermint mochas, you can omit the candy cane, but the mint does add some serious kick to this holiday tradition.
Line a rectangular cake pan, (9*13) with wax paper.
1) Melt chocolate chips, sweetened condensed milk and butter in microwave, stirring, until smooth and chips are melted. Use medium power and stir every 30 seconds. If you don't have a microwave, you can use a double boiler and melt everything on the stove.
2) Stir in peanuts and marshmallows.
3) Spread the mixture in the greased pan. Sprinkle crushed candy cane on top.
Refrigerate until firm, about 2-3 hours. Once firm, you can cut the bars into small cubes and wrap them individually as gifts.
to be cont'd...
More recipes and pictures are on the way, so stay tuned!
Happy Holidays!
Thursday, December 08, 2005
Featured Article on MekanMax
I started writing articles for MekanMax, I am super excited! Only in Turkish though...
Saturday, December 03, 2005
Cinnamon Sugar Cookies

Cenk and I were trying to find a cinnamon cookie recipe we had in Istanbul on our bakery tour. They were very simple but still tasted amazing. I decided to give it a shot with this recipe from Lovescool, it was a good start, but the ones in Istanbul were less buttery and more cinnamonny (!)...don't get me wrong, these were very tasty and perfect for tea and I will keep making them...I used round cutters but you can also shape the dough into a log and slice thin rounds. Our hunt for the cinnamon cookies continues! Stay tuned!
Update: Check out the competition from my sister!
Chocolate Ginger Cookies
From Martha Stewart Cookie Magazine, they were easy to make and worked perfect with the cut-out shapes. I made the large Turkey cookies for the Thanksgiving table settings and used my new leaf cutouts with the leftover dough. I used a small paring knife to get the details on the leaves and the acorns...They look almost too cute to eat...
Makes 4 dozen
2 1/2 cups all-purpose flour
1/2 cup unsweetened Dutch-process cocoa powder
1/2 teaspoon ground ginger
1 teaspoon ground cinnamon
1/2 teaspoon ground nutmeg
1/4 teaspoon ground cloves
1/2 teaspoon coarse salt
1/2 teaspoon baking powder
1/2 teaspoon baking soda
3/4 cup (1 1/2 sticks) unsalted butter, softened
3/4 cup packed dark-brown sugar
1 large egg
1/2 cup unsulfured molasses
1 tablespoon peeled grated fresh ginger
Fine sanding sugar, for sprinkling
1. Preheat oven to 325°. Whisk together flour, cocoa powder, spices, salt, baking powder, and baking soda in medium bowl.
2. Put butter and brown sugar in the bowl of an electric mixer fitted with the paddle attachment; mix on medium speed until pale and fluffy, about 4 minutes. Add egg, molasses, and grated ginger; mix until combined. Reduce speed to low. Add flour mixture; mix until just combined.
3. Halve dough; shape into disks.Wrap each disk in plastic; refrigerate until cold, about 1 hour.Working with 1 disk at a time, roll out dough on a lightly floured surface to a G inch thick. (If dough becomes too soft at any time, freeze until firm.) Cut out shapes with 3-inch acorn- or leaf-shape cookie cutters; space 1 inch apart on baking sheets lined with parchment paper. Refrigerate until firm, about 20 minutes.
4. Score designs with a paring knife; sprinkle with sanding sugar. Bake, rotating sheets halfway through, until firm, 11 to 13 minutes. Cool on sheets on wire racks. Store cookies in an airtight container at room temperature up to 5 days.

Makes 4 dozen
2 1/2 cups all-purpose flour
1/2 cup unsweetened Dutch-process cocoa powder
1/2 teaspoon ground ginger
1 teaspoon ground cinnamon
1/2 teaspoon ground nutmeg
1/4 teaspoon ground cloves
1/2 teaspoon coarse salt
1/2 teaspoon baking powder
1/2 teaspoon baking soda
3/4 cup (1 1/2 sticks) unsalted butter, softened
3/4 cup packed dark-brown sugar
1 large egg
1/2 cup unsulfured molasses
1 tablespoon peeled grated fresh ginger
Fine sanding sugar, for sprinkling
1. Preheat oven to 325°. Whisk together flour, cocoa powder, spices, salt, baking powder, and baking soda in medium bowl.
2. Put butter and brown sugar in the bowl of an electric mixer fitted with the paddle attachment; mix on medium speed until pale and fluffy, about 4 minutes. Add egg, molasses, and grated ginger; mix until combined. Reduce speed to low. Add flour mixture; mix until just combined.
3. Halve dough; shape into disks.Wrap each disk in plastic; refrigerate until cold, about 1 hour.Working with 1 disk at a time, roll out dough on a lightly floured surface to a G inch thick. (If dough becomes too soft at any time, freeze until firm.) Cut out shapes with 3-inch acorn- or leaf-shape cookie cutters; space 1 inch apart on baking sheets lined with parchment paper. Refrigerate until firm, about 20 minutes.
4. Score designs with a paring knife; sprinkle with sanding sugar. Bake, rotating sheets halfway through, until firm, 11 to 13 minutes. Cool on sheets on wire racks. Store cookies in an airtight container at room temperature up to 5 days.
Thursday, December 01, 2005
Update
I haven't written in a week, it seems soo long, but I have a good excuse, I got sick, not too bad, just sore throat and lost my voice, but heavy Vitamin C and Echinacea with DayQuil saved me from the worse. By the way, did you know there is more Vitamin C in half a cup of parsley than an orange? I love Farm Fresh!
In between Thanksgiving rush and getting sick, I managed to squeeze in two cookies: Cranberry-Pistachio biscottis, and Cinnamon Sugar cookies. I will post the recipes and pictures in a day or so! Stay tuned!
In between Thanksgiving rush and getting sick, I managed to squeeze in two cookies: Cranberry-Pistachio biscottis, and Cinnamon Sugar cookies. I will post the recipes and pictures in a day or so! Stay tuned!
Saturday, November 19, 2005
Gobbling Cupcakes!
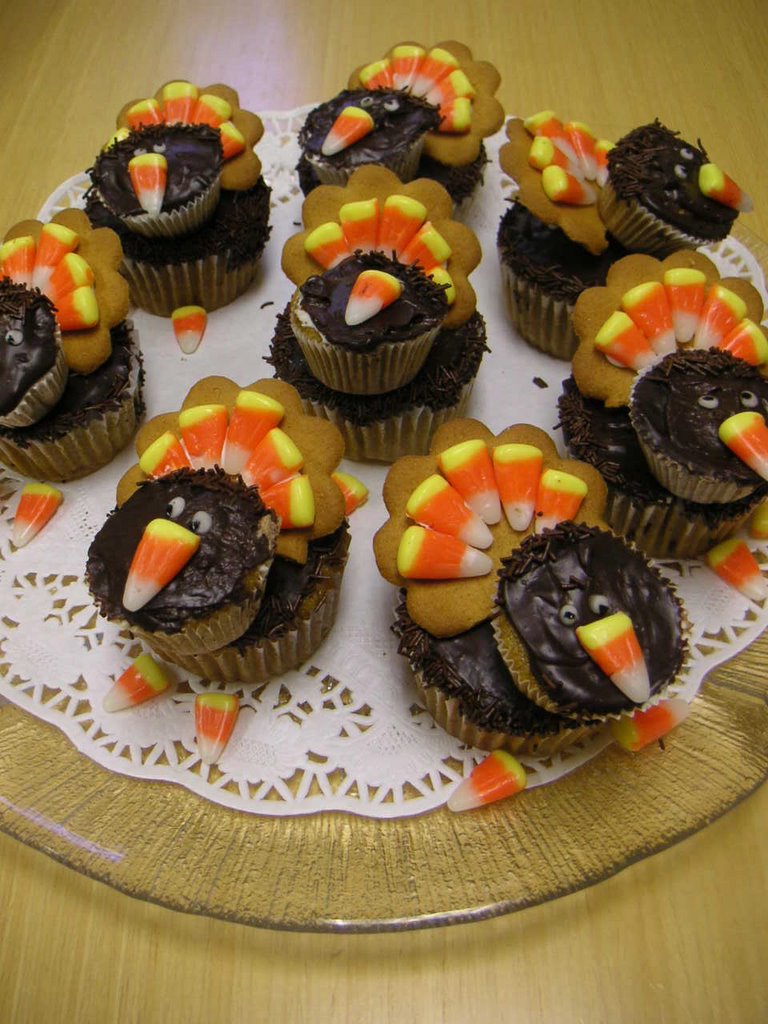
I won the dessert competition at work with these! Pumpkin Cupcakes with Ginger Cream filling and Chocolate frosting...The recipe is from Martha Stewart and the decorations are from the Cupcake Calendar 2005. I stressed out way too much for this competition, messed up the frosting twice and threw away 2 bags of chocolate...sad:((( The hardest part was to find the right sized candy corns, next year, I will be stocking them at Halloween:)
Pumpkin Cupcakes with Ginger Cream and Chocolate Frosting
30 regular cupcakes or 12 regular and 24 mini cupcakes/ 350 degree oven
2 cups flour, all-purpose
1 teaspoon baking powder
1 teaspoon baking soda
1 teaspoon salt
1 teaspoon ground cinnamon
1 teaspoon ground ginger
1/4 teaspoon freshly grated nutmeg
1/4 teaspoon ground allspice
1 cup packed light-brown sugar
1 cup granulated sugar
1 cup unsalted butter, melted and cooled
4 large eggs, lightly beaten
15 ounces pumpkin puree, I used canned
1. Preheat oven to 350 degrees F.
2. In a medium bowl, whisk together flour, baking soda, baking powder, salt, cinnamon, ginger, nutmeg, and allspice; set aside.
3. In a large bowl, whisk together, brown sugar, granulated sugar, butter, and eggs. Add dry ingredients, and whisk until smooth. Whisk in pumpkin purée.
4. Divide batter evenly among liners, filling each about halfway. I find piping the batter easiest way to do this part.
5. Bake until tops spring back when touched, and a cake tester inserted in the center comes out clean, 20 to 25 minutes, rotate pans once in 10 minutes. Transfer to a wire rack; let cool.
Ginger Whipped Cream
2 tablespoons cold water
1 teaspoon unflavored gelatin
2 cups chilled whipping cream
1 teaspoon vanilla extract
1/4 cup flavored simple syrup
1. First make the simple syrup. Heat 1/4 cup sugar, 1/4 cup water, and a 2" chunk of ginger that has been peeled and julienned until boiling and simmer for 3 to 5 minutes. Set aside to cool and strain before using.
2. In a small metal bowl, soak plain gelatin in cold water for 5 minutes.
3. Place the bowl over a small pot of simmering water and stir until dissolved. Set aside to cool.
4. In the bowl of an electric mixer, beat cream until soft.
5. Slowly drizzle in the simple syrup and vanilla, continuing to whip as you do.
6. Add the gelatin all at once and continue whipping until soft peaks form.
7. Finish beating with whisk to adjust consistency.
Chocolate Ganache Frosting
10 ounces bittersweet chocolate, I used Ghiradelli 60% semisweet chocolate chips
4 ounces unsweetened chocolate, chopped
1 cup whipping cream
1/4 cup butter, room temperature
2 cups powdered sugar
1/2 teaspoon salt
1/2 cup whole milk
1 teaspoon vanilla
1. Put chocolates into a heat proof bowl.
2. Heat cream until bubbles form around the edge of the pan, pour cream over the chocolate.
3. Let sit for 1 minute then stir until combined.
4. Add butter to the chocolate (make sure its soft and at room temp) and stir until combined.
5. Whisk together sugar, salt, milk, and vanilla in another bowl until combined.
6. Pour the sugar mixture onto the chocolate mixture, then stir until combined and smooth.
7. Let sit at room temperature until thickened.
8. Beat with an electric mixer until fluffy.
Assemble, follow the below instructions for both the mini and regular size cupcakes.
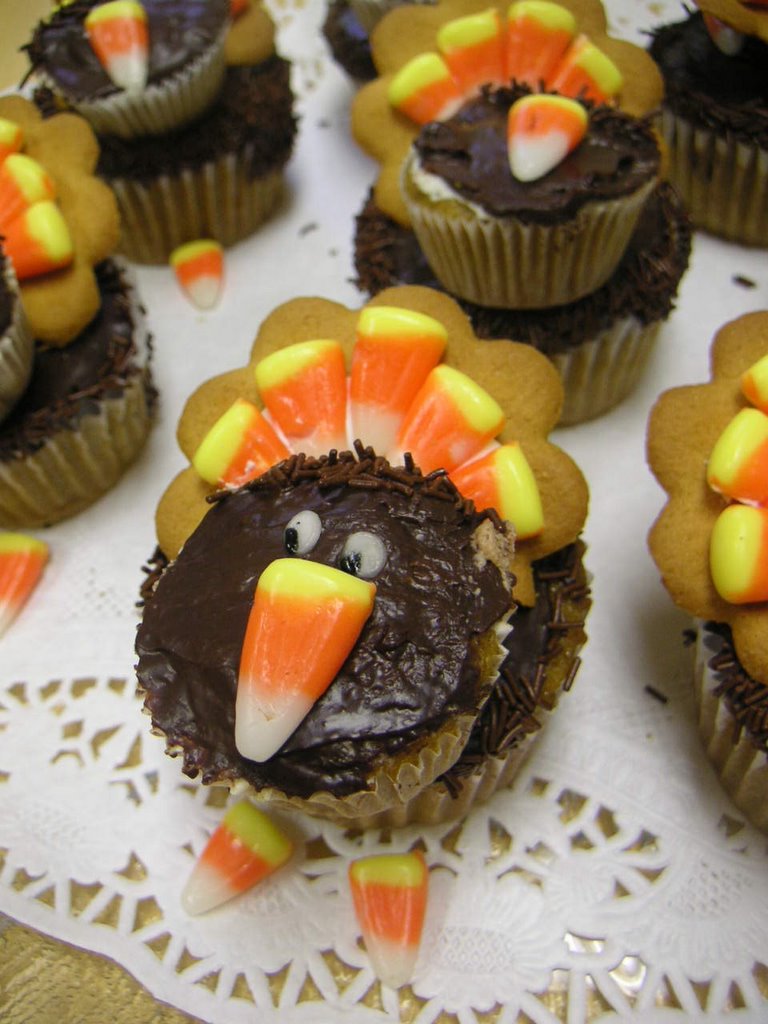
1. Using the back of a pastry tip, scoop out the middle part of the cupcakes and set aside.
2. Pipe ginger cream into the cavity.
3. Frost the cupcakes with chocolate frosting.
4. Pour chocolate sprinkles on a large plate and roll the large cupcakes twice on the sides to get the feathers. Roll the mini cupcakes only on one size to make hair.
5. Pipe white frosting for eyes and tap with black food coloring for the pupils. You can also use mini M&Ms.
6. Use candy corn for the beaks
7. Place the mini cupcakes on top of the regular sized ones
8. To make the feathers, attach candy corn to cookies using royal icing. I used the ultra thin swedish cookies shaped as a flower.
9. Secure the feathers to the cupcakes with a marshmallow.
That's all! Have a great weekend!
Tuesday, November 15, 2005
My New Banner!
It is time to reveal the secret talent behind the new Baking Fairy banner! Belmin did this super cute character for me last week. I am simply speechless.
I was nagging Cenk for help, he works for his own ad agency, however he was putting me off saying they were way too busy. Desperately thinking about backup plans and trying to identify professional illustrators, he called me to say he found someone!
Apparently, Belmin has been working on fairies for a while and she agreed to do something for the Baking Fairy! All it took was a few words to describe what I want, no creative memos or endless conversations on Pantone numbers:) I guess this is what they call creativity and she is so talented!
She doesn't have a website yet, but it won't be long. Don't you think?
Thank you again Belmin'cim! You are the best!
I was nagging Cenk for help, he works for his own ad agency, however he was putting me off saying they were way too busy. Desperately thinking about backup plans and trying to identify professional illustrators, he called me to say he found someone!

Apparently, Belmin has been working on fairies for a while and she agreed to do something for the Baking Fairy! All it took was a few words to describe what I want, no creative memos or endless conversations on Pantone numbers:) I guess this is what they call creativity and she is so talented!
She doesn't have a website yet, but it won't be long. Don't you think?
Thank you again Belmin'cim! You are the best!
Persimmon Date Coffee Cake

I posted in Turkish earlier today for the 4th Food Blogging event organized by Melda. The theme of the month was "dates" and I was determined to bake something, despite a choppy start:)
First, I bought persimmons! Don't laugh. Those of you who are not fluent in Turkish yet (!), persimmons and dates are called the same thing in Turkish; luckily I found this recipe that has both dates and persimmons so problem solved!
Second, my plan was to bake on Sunday and take photos during daylight. However, chit chatting with Ozlem was fun and we stayed up pretty late. I had to squeeze baking to Monday night and obviously I missed the daylight. Call me a food photo snob, but, I hate taking food pictures at night. They just don't look nice. So, I had to take pictures right after the bootcamp this morning, upload them on Flickr and barely made the deadline, but I had to skip my coffee stop-ughghghhgh!
I brought some of it to work and my former Atkin's friendly team liked them a lot! Here is the recipe, I got it from David Lebovitz.
Enjoy!
P.S. Having a deadline totally makes things more exciting and there is a dessert contest at work this Friday! Wish me luck:)
Cift Hurmali Kek
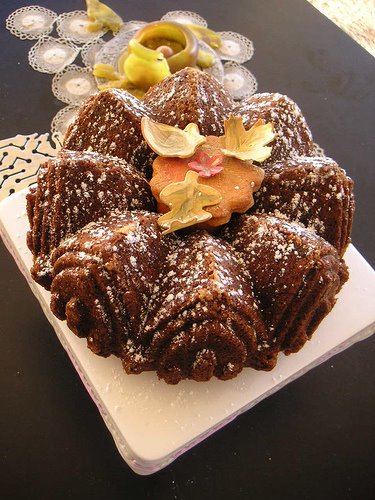
Bizim evde taze hurmayi babam cok sever, sonbahar aylarinda mutlaka mutfakta pembe tabak icinde uc bes tane turuncu hurma buludururdu. Arada sirada da anneannem ve ben ona yardim ederdik, yoksa hurmalar annemin gazabina ugrar ve copu boylardi:) Annemin hurmayla arasi yoktur, genelde daha egzotik meyvalar sever, hindistancevizi haric.
Bloglar Arasi Yemek'te bu ayin konusu hurma olunca, ben de burda eve hurma aldim. Kaliforniya'da taze hurma bulmak hic zor degil, ama en iyi hurmalar Japon marketlerinde; hem ucuz hem de daha taze oluyor... Bu arada ufak bir detayi atlamisim, megersem bu ayin konusu ramazanda yenen kuru hurmaymis, taze hurmalar da cope gitmesin diye cift hurmali bir kek tarifi denemeye karar verdim:) Degisik bir cay keki oldu. Tavsiye ederim, deneyiniz.
Bu arada merak ediyorum, bizim sirkette bu cuma bir yemek yarismasi var ve burda arkadaslarimla konusuyorduk, acaba Turkiye'de yemek yarismalari oluyor mu diye, bilgisi olan varsa lutfen yazsin. Illaki Mutfak dergisinde calismak gerekmiyor ki, yemek yarismasi duzenlemek icin...Neyse, cifte hurmali kekin tarifi asagida...
Cift Hurmali Kek
Eger benim gibi calisiyorsaniz, malzemelerinizi bir gun onceden hazirlarsaniz isiniz bayagi kolaylasir. Tabii ki sadece kuru malzemeleri (un, seker, tuz, gibi). Ben genelde kaselere ya da buz dolabi posetlerine koyuyorum. Keki yapacagim gun de televizyon programlarindaki gibi hersey hazir olmus oluyor! Yani usenmeyiniz sevgili arkadaslarim, onluklerinizin tozunu aliniz:) Haydi mutfaga!
3½ bardak elenmis un (790 gr)
1½ cay kasigi tuz (7.5ml)
2 cay kasigi kabartma tozu (baking powder) (10ml)
1 cay kasigi nutmeg (5ml)
2 bardak esmer seker (452 gr)
1 bardak eritilmis yag, oda sicakliginda (226gr)
4 yumurta, oda sicakliginda, hafifce cirpilmis
1/3 bardak rum (80 ml)
4 taze hurmanin puresi, yaklasik 2 bardak
2 bardak kavrulmus ceviz, iri parcalara kesilmis
2 bardak kuru hurma , 4'e bolunmus
Ocagi 350F'da (175C) isitin. Ben genelde eve gelir gelmez firini aciyorum, malzemeleri karistirken firin isiniyor ve en fazla yarim saatte kekler firina girmis oluyor.
Kek kalibini iyice yaglayip, un ile kaplayin, bunu da bir gun onceden yapabilirsiniz.
Un, tuz, kabartma tozu, nutmeg ve sekeri elekten gecirerek karistirin ve ortasinda bir kuyu acin.
Erimis tereyagi, yumurta, likor ve taze hurma puresini sira ile karistirin, cevizleri ve kuru hurmalari ilave edin. Spatula ile un gorunmeyinceye kadar karistirin.
Yaklasik bir saat pisirin. Kekin oldugunu anlamak icin ortasina bir kurdan batirin, kurdan eger temiz cikiyorsa olmus demektir. Kek soguduktan sonra uzerine pudra sekeri serpin, ben bir de sekerden yaptigim yapraklari koydum, ama vaktiniz yoksa bir iki tarcin cubugu da cok yakisir.
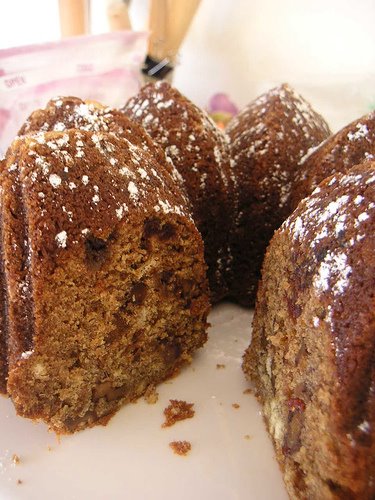
Orjinal tarif David LeBovitz'den....
Monday, November 14, 2005
Baking Fairy Cupcakes for Sale!
I had the best time ever this Saturday at the Dance in the Sprit. My good friends Marc and Christine were working on this project for months and it was a huge success with amazing DJs and Christian music that I haven't really listened to much before.
I just made plans to check out the music and the venue (it was this movie set in Building 3 at Treasure Island)but a miracle happened -no worries, I am not converting to any other religion again:) Christine told me that I could sell stuff as a vendor! It was huge! My first ever bake sale!

I could not me more unprepared though! I am so upset with myself, you don't need an MBA to figure out the basics; like change, those dollar bills are sooo valuable (!), table cloth, lights, BUSINESS CARDS!!!...and I do have an MBA, sorry Dad!
Luckily, I have friends who live on the island and got a table and a table cloth from Ozlem and Ahmet, thanks guys! I had to write my contact information on napkins....Oh well, I so will laugh at this post, in a couple years when my business picks up...:)
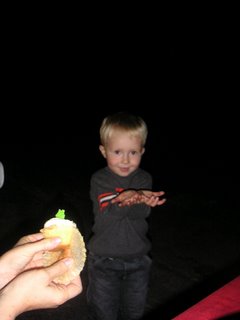
I made these chocolate and vanilla cupcakes with vanilla buttercream. Check out the pictures on Flickr, I love the one with Matthew digging right on to the frosting...Whew, the ultimate taste test! He liked it and even got a second one!
I know you are curious, I did make money! I could have made more if listened to Eric and Natalie:) Leftovers went to church, for good karma:)
Now, I have some cash to spend on my business cards! I'm loving this!
I just made plans to check out the music and the venue (it was this movie set in Building 3 at Treasure Island)but a miracle happened -no worries, I am not converting to any other religion again:) Christine told me that I could sell stuff as a vendor! It was huge! My first ever bake sale!

I could not me more unprepared though! I am so upset with myself, you don't need an MBA to figure out the basics; like change, those dollar bills are sooo valuable (!), table cloth, lights, BUSINESS CARDS!!!...and I do have an MBA, sorry Dad!
Luckily, I have friends who live on the island and got a table and a table cloth from Ozlem and Ahmet, thanks guys! I had to write my contact information on napkins....Oh well, I so will laugh at this post, in a couple years when my business picks up...:)
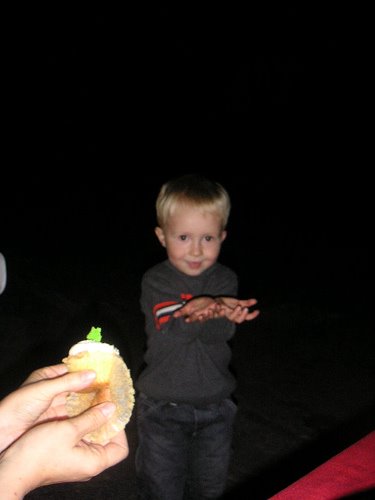
I made these chocolate and vanilla cupcakes with vanilla buttercream. Check out the pictures on Flickr, I love the one with Matthew digging right on to the frosting...Whew, the ultimate taste test! He liked it and even got a second one!
I know you are curious, I did make money! I could have made more if listened to Eric and Natalie:) Leftovers went to church, for good karma:)
Now, I have some cash to spend on my business cards! I'm loving this!
Friday, November 11, 2005
Holiday Cookie Baking is ON!
I've officially started my holiday cookie baking. Yay! That part is easy, the hard part is to decide which of the 150 cookies in the latest Martha Stewart Cookie Magazine is going to make it into the cookie boxes. And before I could even try any of the recipes from Martha, I had to do these biscotti's that I saw on Heidi's site, slightly revised.

Why biscotti? My mom is a big fan of biscottis and she is very particular about them" too soft, too almondy, too crunchy, too thin, too thick..." But, no complains, I like playing around with the recipes, trying to perfect them. So, here is the first batch hot of the oven!
Super Healthy Pistachio-Chocolate Biscottis
Biscottis are baked twice with a considerable amount of prep work. A rainy day or a fresh cup of cofeee in the afternoon are great reasons to spend time in the kitchen!
2/3 cup whole wheat flour
1 1/4 cup whole wheat pastry flour
1/3 cup wheat germ
1/2 teaspoon sea salt
1 teaspoon baking powder
6 tablespoons unsalted butter, room temperature
3/4 cup dark brown sugar
2 large eggs, room temparature
zest of one orange
1/4 teaspoon almond extract
1/3 cup shelled pistachios
3/4 good quality semisweet chocolate chips chopped fine
Preheat your oven to 325 and line a cookie sheet with parchment paper.
Sift the whole wheat pastry flour, whole wheat flour, wheat germ, salt, and baking powder in a small bowl.
Using a mixer, beat the butter and sugar together until creamy for two minutes (Kitchen Aid @ 6).
Add the eggs, zest, and almond extract. Mix until well combined, scaping down the sides with a spatula to make sure you get a good mix.
Add the dry ingredients to mixer and continue mixing with slow speed (Kitchen Aid @ 3) until the dough comes together. Stir in the shelled and roughly cut pistachios and chocolate chips.
Shaping the biscotti:
Wax paper comes handy for this task as the dough is pretty stiff and sticky. Get the dough on the wax paper and using a ruler as a guide, don't laugh, I like to be precise as much as I can, flatten the dough into a log shape about 4-inches wide by 12-inches long.
First Baking:
Place the dough on a baking sheet lined with parchment and into the oven for 30-35 minutes. It will get its shape in this round and and brown a little. Take the log out from the oven on a cooling rack and reduce the oven temperature to 300F.
Let the biscotti log cool for about 10 to 15 mins so you will be able to slice it with little damage.
Use a serated knife to cut the log into 3/4-inch biscottis. I think mom likes them diagonal, so I always cut them this way but you can also do smaller straight cuts.
Second Baking:
Arrange the slices cut side up on the baking sheet and return to the oven for another 30 minutes. They might be slightly soft coming out of the oven, but will firm right up as they cool off on the counter.
For step by step instructions, check out the pictures on Flickr.
Ok, now back to cupcakes:)
Afiyet Olsun!
*Turkish for Bon Appetit!

Why biscotti? My mom is a big fan of biscottis and she is very particular about them" too soft, too almondy, too crunchy, too thin, too thick..." But, no complains, I like playing around with the recipes, trying to perfect them. So, here is the first batch hot of the oven!
Super Healthy Pistachio-Chocolate Biscottis
Biscottis are baked twice with a considerable amount of prep work. A rainy day or a fresh cup of cofeee in the afternoon are great reasons to spend time in the kitchen!
2/3 cup whole wheat flour
1 1/4 cup whole wheat pastry flour
1/3 cup wheat germ
1/2 teaspoon sea salt
1 teaspoon baking powder
6 tablespoons unsalted butter, room temperature
3/4 cup dark brown sugar
2 large eggs, room temparature
zest of one orange
1/4 teaspoon almond extract
1/3 cup shelled pistachios
3/4 good quality semisweet chocolate chips chopped fine
Preheat your oven to 325 and line a cookie sheet with parchment paper.
Sift the whole wheat pastry flour, whole wheat flour, wheat germ, salt, and baking powder in a small bowl.
Using a mixer, beat the butter and sugar together until creamy for two minutes (Kitchen Aid @ 6).
Add the eggs, zest, and almond extract. Mix until well combined, scaping down the sides with a spatula to make sure you get a good mix.
Add the dry ingredients to mixer and continue mixing with slow speed (Kitchen Aid @ 3) until the dough comes together. Stir in the shelled and roughly cut pistachios and chocolate chips.
Shaping the biscotti:
Wax paper comes handy for this task as the dough is pretty stiff and sticky. Get the dough on the wax paper and using a ruler as a guide, don't laugh, I like to be precise as much as I can, flatten the dough into a log shape about 4-inches wide by 12-inches long.
First Baking:
Place the dough on a baking sheet lined with parchment and into the oven for 30-35 minutes. It will get its shape in this round and and brown a little. Take the log out from the oven on a cooling rack and reduce the oven temperature to 300F.
Let the biscotti log cool for about 10 to 15 mins so you will be able to slice it with little damage.
Use a serated knife to cut the log into 3/4-inch biscottis. I think mom likes them diagonal, so I always cut them this way but you can also do smaller straight cuts.
Second Baking:
Arrange the slices cut side up on the baking sheet and return to the oven for another 30 minutes. They might be slightly soft coming out of the oven, but will firm right up as they cool off on the counter.
For step by step instructions, check out the pictures on Flickr.
Ok, now back to cupcakes:)
Afiyet Olsun!
*Turkish for Bon Appetit!
Wednesday, November 09, 2005
Matcha Buttercream
I am addicted to green tea in my sweets, ice cream to soft caramel candies. It goes back to 1997, Japan where I had at least one package of these green tea candies daily, thanks to a young monk who was a regular at the temple I was staying. My Japanese wasn't good enough to say anything close to "Please don't spoil me this much, we don't have these back home!", instead I kept saying "Arigato gozaitmasu (thank you very much)". As expected, years gone by without them. After coming to San Francisco, I re-discovered the same flavor with the green tea mochi ice creams from Trader's Joes. I even found the candies on Clement Street, at that amazing Crepe place across the street from the infamous Burma Super Star.
Note to self and the v-ball crew: We should eat there pretty soon and I need to get some more of those candies and post pictures:)
A quick tip: Do not try piping with ziploc or this happens and you will have to start over again...these metal tips work best with a pastry bag!
So, try it…I know green tea is not everyone's favorite and that's ok but seriously, it really looks very pretty and it tastes so good, you might even like the flavor!
Oh, before I forget, here is an extra tip: You can also use matcha powder in place of green food coloring and also dust sugar decorations; think leaves, trees or grapes....
Next up are Matcha Chocolate Pudding from 101 Cookbooks and the famous Green Tea Opera Cake from Keiko.
*Update: not only my ex-roommate but he is also my best friend in the whole world even though he left me all alone here and has no plans coming back any time soon:( Better?
Note to self and the v-ball crew: We should eat there pretty soon and I need to get some more of those candies and post pictures:)
So, all this green tea background was actually the warm-up for the real deal among the pastry world: Matcha. It is th e green tea leaves in powder form. A couple weeks ago, Cenk, my ex-roommame* who is back in Istanbul now, saw this amazing cake from Keiko and asked me to send some matcha for him. Of course I had to buy one for myself, too!
I started playing with it this weekend and came up with something simple but very tasty. Matcha Buttercream … Just mix a teaspoon of matcha with a cup of vanilla buttercream and there you have it….It blends wonderful with dark chocolate and luckily, I had some leftover chocolate cupcakes from the Plaid Party!
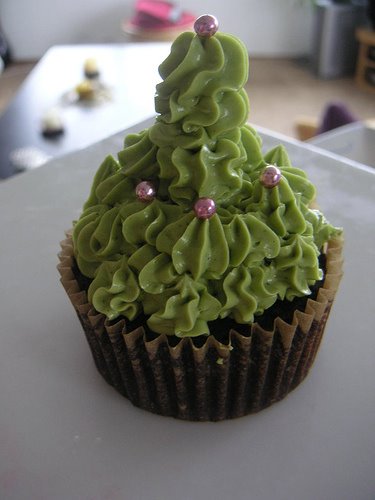 e green tea leaves in powder form. A couple weeks ago, Cenk, my ex-roommame* who is back in Istanbul now, saw this amazing cake from Keiko and asked me to send some matcha for him. Of course I had to buy one for myself, too!
I started playing with it this weekend and came up with something simple but very tasty. Matcha Buttercream … Just mix a teaspoon of matcha with a cup of vanilla buttercream and there you have it….It blends wonderful with dark chocolate and luckily, I had some leftover chocolate cupcakes from the Plaid Party!
A quick tip: Do not try piping with ziploc or this happens and you will have to start over again...these metal tips work best with a pastry bag!
So, try it…I know green tea is not everyone's favorite and that's ok but seriously, it really looks very pretty and it tastes so good, you might even like the flavor!
Oh, before I forget, here is an extra tip: You can also use matcha powder in place of green food coloring and also dust sugar decorations; think leaves, trees or grapes....
Next up are Matcha Chocolate Pudding from 101 Cookbooks and the famous Green Tea Opera Cake from Keiko.
*Update: not only my ex-roommate but he is also my best friend in the whole world even though he left me all alone here and has no plans coming back any time soon:( Better?
Tuesday, November 08, 2005
Plaid Party and Plaid Cupcakes

Mac and Melissa had their 7th, (Mac's 2nd), annual Plaid Party this weekend. Plaid is "ekose", my Turkish friends, don't go crazy trying to figure out what the hell plaid is...
Over the last couple of weeks, maybe months, there must have been some serious plaid shopping going around the stores on Haight and the Mission. People were serious about this party, there were even out-of-towners:)
Napoleon Dynaplaid and Deb were my favorites, though Mac won the "Plaidest of all" medallion, his wife was the judge, hello!!! My outfit was rather plain, a headband and a wrap plaid skirt...Oh well, I already started thinking about next year:) Check out the plaid craze yourself! Pictures!
The Chocolate-Coconut Cupcakes:
Decorating the cupcakes for the party was as hard as finding stuff to wear...I had to do some serious pattern search to understand what exactly counts as plaid.
I knew checkers wouldn't qualify, but had no idea there was also argyle?!! A seriously dressed up couple actually disqualified from the contest because of that, so heart breaking:(( Anyways, here is what I did for dessert; Chocolate-Coconut Cupcakes with Vanilla Buttercream from Collette's book.
This was by far the easiest cake I have ever done. Even if you don't like coconut, try this moist cake, you can simply omit the coconuts. It is also a no-mess recipe, all you need are two bowls and some basic pantry items. All mixing is done by hand, so you can give your Kitchen-Aid a break. If omitting coconut, try adding orange zest for a citrusy twist or ground coffee for a mochalicious treat!
Recipe:
* Makes 24 cupcakes or 2-8 inch round cakes
I suggest measuring the dry ingredients a day in advance. It makes the whole process much more simple and relaxing.
2 cups of all purpose flour
1 teaspoon baking soda
1/4 teaspoon salt
2 cups of sugar
1 3/4 cups strong coffee (hot)
1/4 cup Kahula (original recipe called for Bourbon, but I had none)
5 ounces of unsweetened chocolate, chopped into small bites for even melting
2 sticks of butter (113*2, 226 gr)
2 eggs at room temperature (very important)
2 teaspoons of vanilla extract
1/2 cup sweetened coconut flakes
On the day you plan to bake the cake or the cupcakes, heat the oven to 275F. Note the low temperature.
1) Make the hot coffee, I just boiled water used instant coffee, you can use drip coffee as well. Add butter cubes, chopped chocolate and coffee liquor (or bourbon) and let it melt in 15-20 minutes. Cover the bowl with a plate upside down. Add the sugar, whisk well (10 strokes) and let it cool for another 10-15 minutes.
2) Add the flour mixture in two batches and add eggs and vanilla and then the coconut. That's all.
3) Fill the muffin pans lined with cupcake liners, or the 8 inch cake pans lined with parchment paper. Bake the cupcakes for 20 minutes, (45 minutes for the larger cakes) and let them cool in the pan. Once cooled you can start decorating as you wish...
No more plaid for me for a while...Enjoy!
Monday, November 07, 2005
Breakfast from Sicily
This morning, I had a cannolo for breakfast from Pasticceria Minotauro-hand delivered!
Eric just got back from Sicily yesterday and he was able to sneak in one of these, (was really surprised and literally jumped of bed). Of course, I tasted it immediately and left some for breakfast. It was great after this morning's bootcamp. Oh, yes, I am doing this crazy bootcamp every morning.
Oh, now the bets
are on for the best cannoli in town:) I already have the metal tubes to make the shells, all I need is good ricotta cheese, maybe this recipe from Heidi would do...
Cannoli adventures are coming up soon, but I still suggest we all go and eat the original where it all started! I am sure Eric will post pictures from his trip soon, so come back for more, I will update the post then!
P.S. Jack, you need to plan a visit for tasting:)

Eric just got back from Sicily yesterday and he was able to sneak in one of these, (was really surprised and literally jumped of bed). Of course, I tasted it immediately and left some for breakfast. It was great after this morning's bootcamp. Oh, yes, I am doing this crazy bootcamp every morning.
Oh, now the bets
are on for the best cannoli in town:) I already have the metal tubes to make the shells, all I need is good ricotta cheese, maybe this recipe from Heidi would do...
Cannoli adventures are coming up soon, but I still suggest we all go and eat the original where it all started! I am sure Eric will post pictures from his trip soon, so come back for more, I will update the post then!
P.S. Jack, you need to plan a visit for tasting:)
Subscribe to:
Posts (Atom)